
Turning an previous 1984 Honda Goldwing 1200 into one thing new takes loads of time, planning, and hands-on work. They began by shopping for the bike for a low worth and commenced stripping away additional elements just like the entrance fairing, saddlebags, and previous lights. Every step introduced new concepts, equivalent to including a contemporary spherical headlight and {custom} LED tail lights.
Mechanical repairs and updates adopted, with consideration to necessities like air filters, spark plugs, and brake fixes. The challenge additionally included customizing the seat, transforming the sprint and speedometer, and making artistic modifications for a clear look. Each activity meant figuring issues out alongside the best way, resulting in a novel and contemporary tackle this traditional bike.
Key Takeaways
- The challenge started with a full teardown and artistic imaginative and prescient.
- Mechanical and styling upgrades have been carried out step-by-step.
- Customized options and repairs turned the Goldwing into one thing particular.
Venture Overview
Shopping for the Bike and Managing Prices
The challenge began with a 1984 Honda Goldwing 1200, bought for $400. The proprietor set a transparent plan to maintain prices low by eradicating pointless elements and reusing or updating what was wanted. Some important replacements included the air filter, oil, oil filter, spark plugs, and seat.
A desk beneath lists the most important bills as described:
| Merchandise | Standing |
|---|---|
| Honda Goldwing 1200 | Bought |
| Air Filter | On order |
| Oil & Oil Filter | Changed |
| Spark Plugs | Changed quickly |
| Seat | Substitute, modified |
| Headlight | New, ordered |
| Taillight | New, ordered |
He aimed to solely spend cash on a very powerful elements and made modifications when he may as an alternative of shopping for new.
Objectives and Plans for the Goldwing
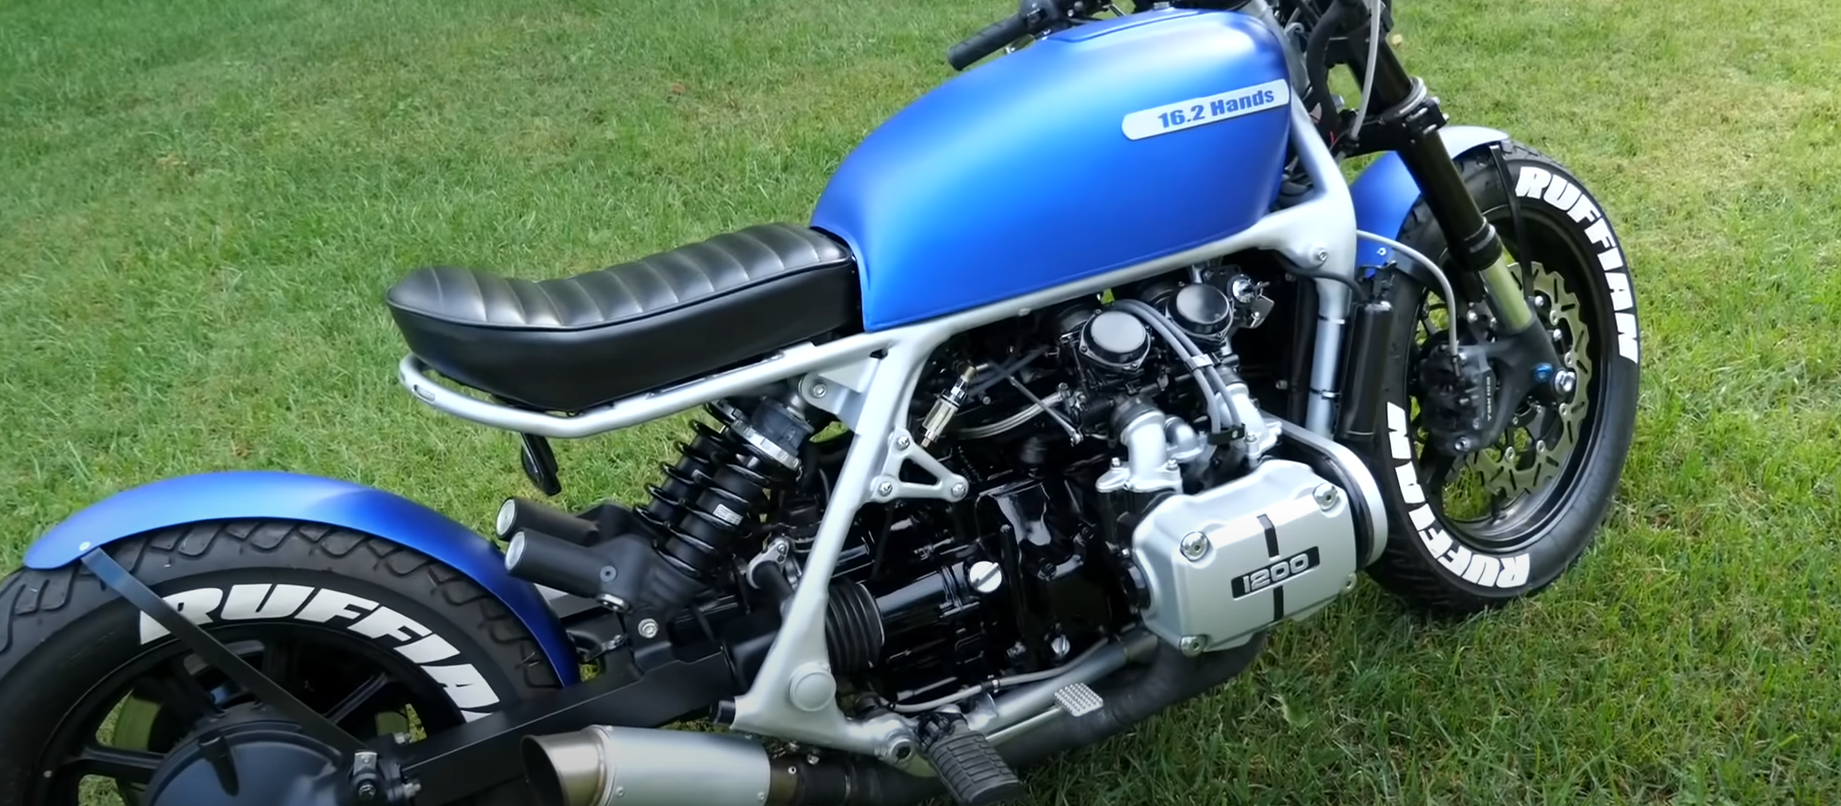
The principle purpose was to strip down the bike and construct one thing {custom}, eradicating the entrance fairing, saddlebags, and previous lighting. Plans included:
- Putting in a spherical 7-inch headlight with built-in blinkers
- Including an LED strip taillight with built-in blinkers
- Modifying the seat for a brand new form and decrease profile
- Remodeling the sprint and wiring for a cleaner look
- Testing other ways to dam off and cap previous parts
- Customizing the speedometer and mounting it in a brand new method
- Bettering the brakes by attempting a special caliper setup
The challenge took a trial-and-error strategy so modifications and new concepts occurred because the work progressed. Every step centered on making the bike lighter, extra compact, and tailor-made to the proprietor’s preferences.
Key plans have been dealt with as they got here up, and fixing or changing damaged elements was a part of the method. The imaginative and prescient remained clear: flip the previous Goldwing into a novel and easy journey.
Breaking Down the Goldwing
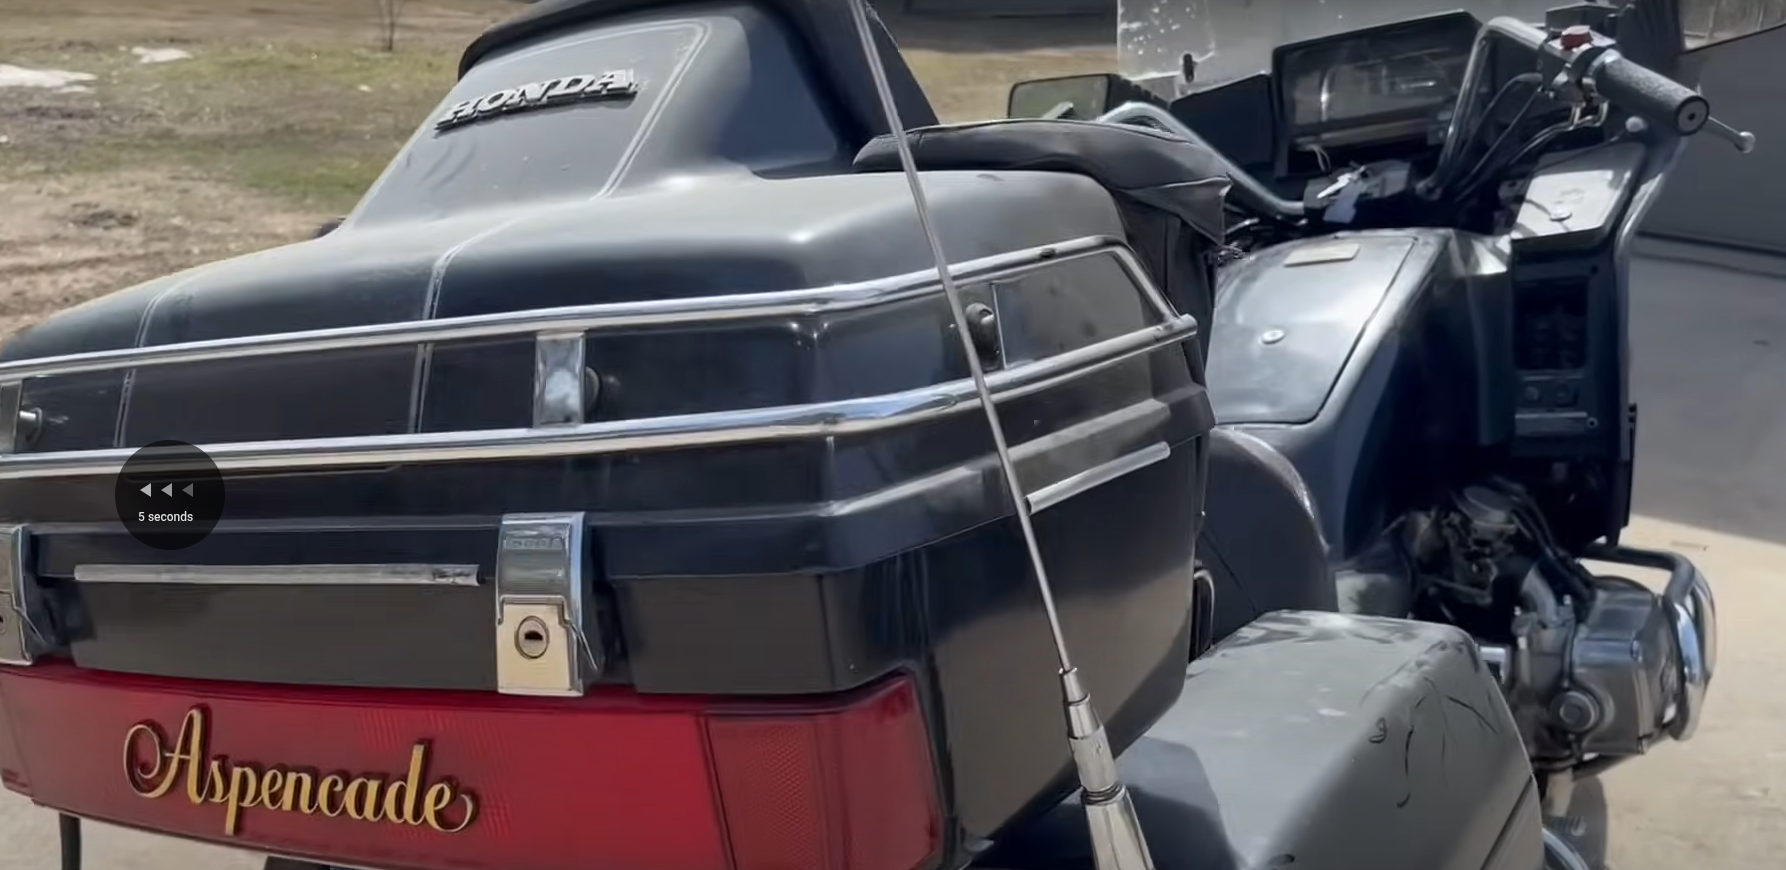
Taking Off the Entrance and Further Elements
First, the entrance fairing, facet covers, and all storage luggage have been eliminated. The unique lights and a lot of the wiring have been pulled off fastidiously. A listing of what was taken aside:
| Eliminated Elements | Notes |
|---|---|
| Entrance Fairing | Changed with a brand new spherical 7-inch headlight |
| Aspect Covers | Uncovered a lot of the body |
| Saddlebags | Cleared out for a cleaner look |
| Further Lights | Making ready for brand new LED strips |
| Airbox and Sprint Panel | Put aside for repairs and upgrades |
The air filter was lacking, so a brand new one obtained ordered. The exhaust was rusted and wanted changing, which matched the plan to chop and simplify the exhaust.
The seat noticed some main modifications. Reducing away additional foam and shaping it for a decrease, slimmer really feel. The plan included rounding off the corners and trimming any additional bulk for a extra primary look.
Washing Up and First Look
After a lot of the huge items have been gone, it was time to wash the bike. A contemporary wash revealed how a lot totally different the Goldwing regarded with its naked body. The group checked which wires have been nonetheless wanted for the brand new lights and sprint.
A brand new headlight was put in, and concepts for the brand new seat and windshield began coming collectively. Some modifications within the wiring meant loads of leftover cables, which wanted to be hidden. Cardboard templates helped think about new covers and brackets earlier than making them from metallic.
The brand new form of the bike began to point out. With the entrance cleared up and additional weight gone, plans have been made for a smaller sprint and up to date speedometer. Every change made the bike look much less like a touring bike and extra like a {custom} construct.
Fixing Engine Necessities and Upgrading Elements

Altering Filters and Recent Oil
He began by eradicating the previous airbox. After checking, it was clear the bike wanted a brand new air filter. The unique filter was lacking, so he ordered a alternative. Utilizing new oil and a clear oil filter, he made positive the engine had what it wanted for easy working.
A easy upkeep guidelines he adopted:
- Take away previous airbox
- Examine for lacking or soiled air filter
- Substitute with new air filter
- Drain previous oil
- Set up contemporary oil filter
- Add clear engine oil
Common oil and filter modifications assist the engine last more and work higher.
Changing Spark Plugs and Dealing With the Exhaust
He put in new spark plugs to maintain the engine firing sturdy. Whereas wanting over the exhaust, he discovered that it had rusted by way of and damaged off. Though this was surprising, it occurred to be near the place he deliberate to chop the pipe anyway.
Fast exhaust replace:
- Outdated exhaust rusted off by itself
- Good timing for making {custom} modifications
- No want for additional chopping instruments right here
Putting in new spark plugs and fixing up the exhaust make a giant distinction in energy and sound.
Brake Work within the Rear and Planning for Twin Calipers
There have been issues with how smooth the rear brake felt. He suspected a leak alongside the road to the entrance caliper. To make issues work safely, he deliberate to dam off the entrance caliper in the intervening time.
He is considering switching to a twin caliper setup for the entrance brakes later, which is a technique utilized in off-road bikes and four-wheelers. For now, the primary focus is on ensuring the rear brake works because it ought to so the bike is secure to journey.
Brake plans:
| Drawback | Step Taken | Future Plan |
|---|---|---|
| Rear brake spongy | Blocked entrance caliper | Add twin entrance calipers later |
| Suspected leak | Examine brake traces | Full system examine after repairs |
Fixing the brakes is a crucial security step earlier than placing any miles on the bike.
Upgrading Lights and Wiring
Putting in New Entrance and Rear Lights
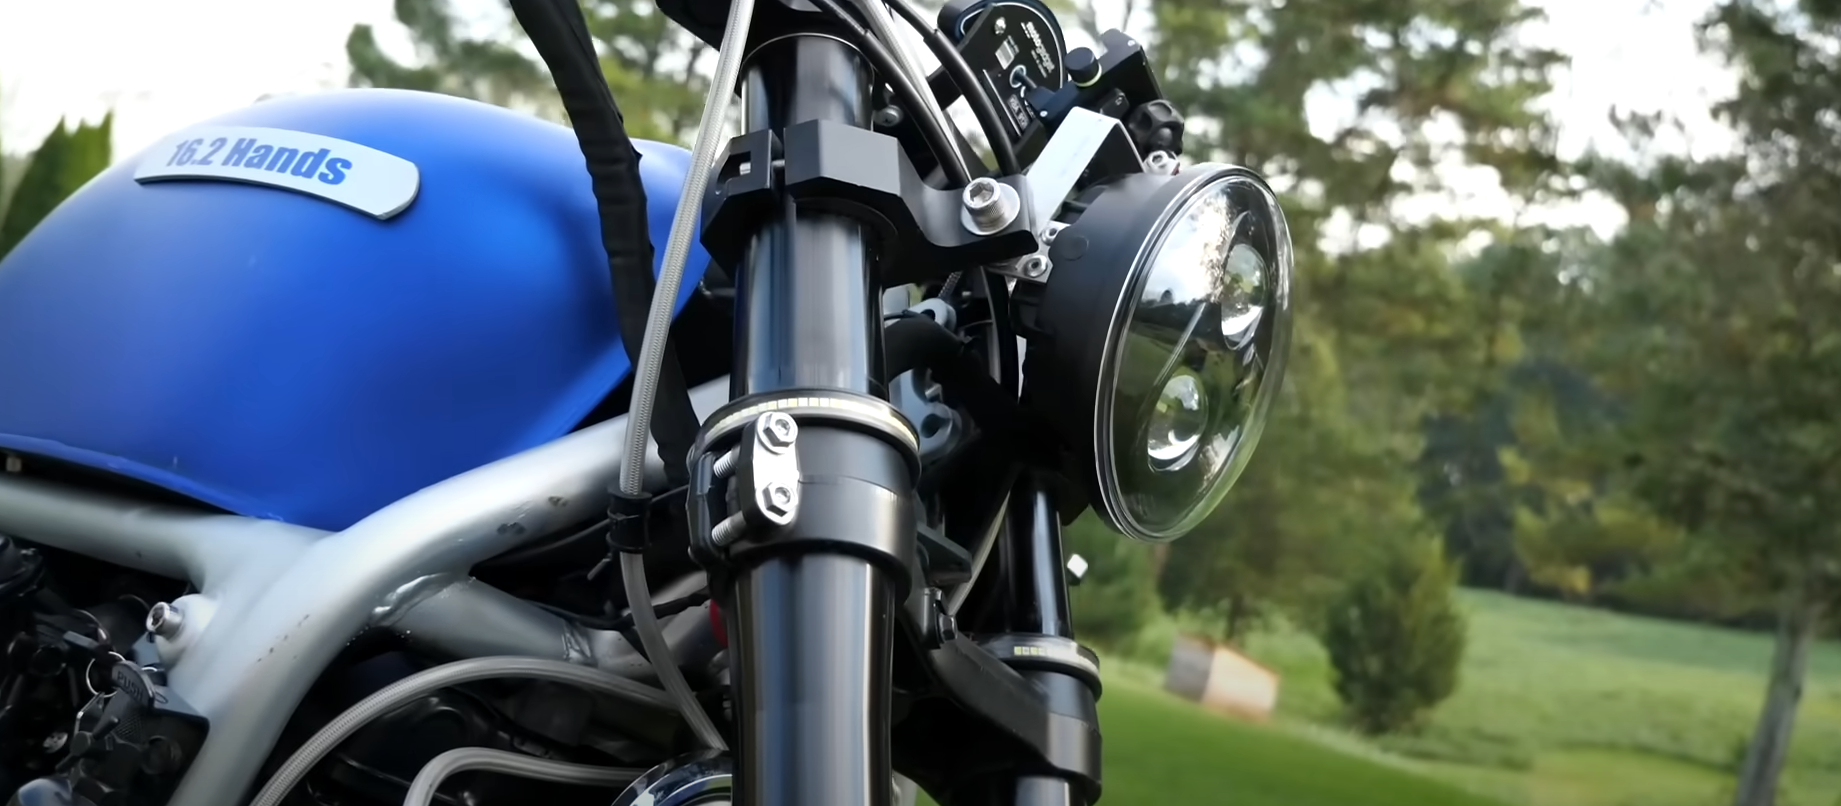
The unique lights and ponderous fairings have been eliminated to present a cleaner look. A brand new 7-inch spherical headlamp was chosen for the entrance, offering a easy, trendy replace. This new headlight is about as much as deal with built-in flip indicators for a streamlined end. On the again, a skinny LED strip was added to function each a tail mild and switch indicators. The rear fender was trimmed to suit the brand new model and permit a extra {custom} match for the lighting strip.
| Mild | Kind | Placement |
|---|---|---|
| Headlight | Spherical, 7-in | Entrance middle |
| Tail Mild | LED Strip | Rear, trimmed fender |
Updating Flashers and Fundamental Wiring
With the unique wiring harness uncovered, unused connections—like these for the radio—have been tagged and unnoticed. The wiring for the flip indicators was recognized and routed to the brand new lights. Every blinker wire was related with consideration to unique labeling and checked earlier than remaining set up. Bunched wiring was organized and tucked away in a storage space underneath the seat to maintain the setup tidy.
- Superfluous wiring (radio, compressor) eliminated or minimize
- Blinker and predominant wiring related on to new lights
- Zip ties and storage field used to maintain free wires managed
Connecting Flip Alerts and Instrument Show
After eradicating the inventory sprint, the indicator lights and sprint electronics have been examined for operate. The plan was to mount the show nearer to the driving force, utilizing a part of the unique housing. Customized facet panels have been created for a clear show set up. Solely important indicators, such because the oil mild and switch indicators, have been stored energetic. Mounting options for the brand new show included an aluminum plate with a custom-cut slot for the ignition key.
Particulars on sprint and indicator integration:
- Sprint cluster eliminated and customised
- Solely vital indicator lights connected
- Aluminum mounting plate fabricated
The main focus was all the time on clear wiring, dependable operate, and a minimal, traditional look.
Altering the Seat
First Steps with the Seat
The very first thing carried out was eradicating the previous seat from the bike. It wanted modifications to match the brand new feel and look. Elements of the seat have been marked for chopping. The plan was to trim the seat so it could match higher and canopy solely what was wanted.
A cardboard template was used to assist see how new elements may match. This helped resolve the place to maintain or take away materials.
Smoothing and Shaping the Cushion
Subsequent, additional padding and raised areas have been minimize away. The seat was trimmed alongside marked traces to decrease the peak in sure spots. Corners have been rounded off and the perimeters have been smoothed out to make the seat match higher with the remainder of the bike.
Some “ears” on the seat have been minimize off as a part of this step. After tough shaping, finer cuts and sanding made the seat look cleaner.
Setting and Adjusting the Seat
To place the seat again on the bike, it was test-fitted a number of occasions. Every time, small changes have been made so it could line up with the shocks and body.
Plans have been made to make use of metallic plates for mounting. The seat is now set as much as each look good and keep agency in place whereas driving.
Key changes made have been:
- Ensuring the seat covers vital elements
- Lining up with current mounting factors
- Trimming the perimeters for a greater match with the bike’s body
Customized Constructing Steps and Power Enhancements
Steel Sheets and Windshield Concepts
Sheet metallic performed a key position on this challenge. The fabricator modeled shapes utilizing cardboard first, then deliberate to interchange these with sheet metallic. One thought was to create a curved wind deflector or windshield across the new headlight. This is able to assist block the wind whereas maintaining the look easy and tidy.
Right here’s a fast abstract:
| Element | Materials | Goal |
|---|---|---|
| Windshield | Sheet Steel | Block wind, easy look |
| Mockup | Cardboard | Check shapes and match |
Finish Caps and Fender Changes
Sure bike elements had open or tough edges after stripping down the bodywork. To repair this, the builder experimented with capping the ends utilizing {custom} plates. The rear fender additionally wanted trimming for a cleaner model. He thought of chopping and shaping the seat to higher match the brand new look and expose vital body elements, whereas nonetheless masking crucial sections.
Record of key modifications:
- Capped uncovered ends with flat plates.
- Trimmed rear fender for a smoother end.
- Lower, reshaped, and slimmed down the seat to match new design.
Hiding Storage Areas and Routing Wiring
With the physique panels eliminated, leftover wires turned extra seen. The builder organized wiring utilizing tags to determine every operate (for instance, headlights, blinkers, and sprint connections). To maintain issues neat, he deliberate to tuck extra wires into hidden storage spots and use zip ties for non permanent fixes.
Further steps included:
- Organizing wires into labeled bundles.
- Hiding wiring inside new storage areas.
- Concealing muddle with out sacrificing easy accessibility.
Speedometer and Dashboard Makeover
Taking Aside the Outdated Setup
First, the unique dashboard and speedometer housing have been eliminated. Wires for the previous radio, flip indicators, and different gauges have been labeled to maintain issues organized. The principle purpose was to strip away additional elements so solely the important features remained.
A cautious teardown uncovered the within of the housing. The speedometer itself was separated, and the cracked plastic cowl was discarded. The previous wiring created loads of muddle, so unused wires have been tucked away or deliberate for removing.
Constructing a New Speedometer Holder
A {custom} holder for the speedometer was designed utilizing cardboard as a mock-up. After testing the scale and form, the mock-up was transferred to extra sturdy materials. The perimeters of the brand new housing have been glued in place and later sanded easy.
To safe the brand new speedometer, an aluminum plate was used. Holes have been minimize for the ignition key and for mounting factors. The completed plate would let the speedometer and ignition match neatly into their new positions.
Supplies Used:
- Cardboard (for modeling)
- Sheet metallic or aluminum (for the ultimate mount)
- Glue and zip ties
- Sandpaper
Making the Dashboard Match the New Look
The brand new dashboard design wanted to mix in with the {custom} headlight and format. Plans included trimming off massive sections and including a flat sheet or wind block in entrance. The dashboard sides have been rounded, and the sides have been formed to match the remainder of the bike.
Unused indicator lights have been eliminated or changed with a easy oil warning and switch sign lights. Wires have been hidden in a small compartment to maintain the realm neat. The tip purpose was a clear look with solely probably the most crucial gauges and lights left seen.
Key Visible Adjustments:
- Smoothed and painted new housing
- Fewer switches and lights
- Hidden wiring for a tidy look
Wrapping Up the Construct and What Comes Subsequent
Putting in the Entrance Mild and Wind Deflector
A brand new 7-inch spherical entrance mild was chosen to interchange the unique headlight. The up to date mild is designed to incorporate blinker features, making the setup cleaner and fewer cluttered. The present stage entails adjusting the fitment of this new headlight, attempting to tuck it again for a greater look.
There may be nonetheless some uncertainty concerning the wind deflector design. Preliminary concepts concerned shaping sheet metallic or utilizing a curved setup to assist block the wind across the new mild. Prototypes have been made with cardboard to visualise choices, however the remaining form and mounting technique are nonetheless underneath assessment. Choices like trimming down massive sections or switching to a flatter plate are being thought of.
Right here’s a fast breakdown of what’s put in and what’s nonetheless being examined:
| Element | Standing | Feedback |
|---|---|---|
| 7-inch headlight | Slot in progress | Searching for a tighter match |
| Windshield idea | In design part | Cardboard fashions examined |
| Blinker wiring | Prepared | Blinker wires recognized |
Shifting Ahead and Ongoing Points
Some elements of the challenge are ready on new concepts or elements. The seat has gone by way of the primary spherical of trimming and reshaping, however nonetheless wants extra work for a cleaner profile. The plan is to maintain chopping and shaping the froth and edges till it matches as needed.
Free wiring is one other space that wants consideration. Whereas practical connections are made, the additional wires are messy. A small space for storing subsequent to the sprint will probably be used to cover and manage these. Different sprint elements, just like the speedometer and indicator lights, are being mounted with new brackets and aluminum help shapes.
Unsolved issues embrace:
- Deciding on the ultimate wind deflector form
- The best way to cap off open ends after chopping the body
- Completely mounting the reworked dashboard
- Managing and hiding additional wiring for a neat look
The work will proceed step-by-step, refining every half as new concepts and challenges come up.